How to Set Up a Static Website with Nginx

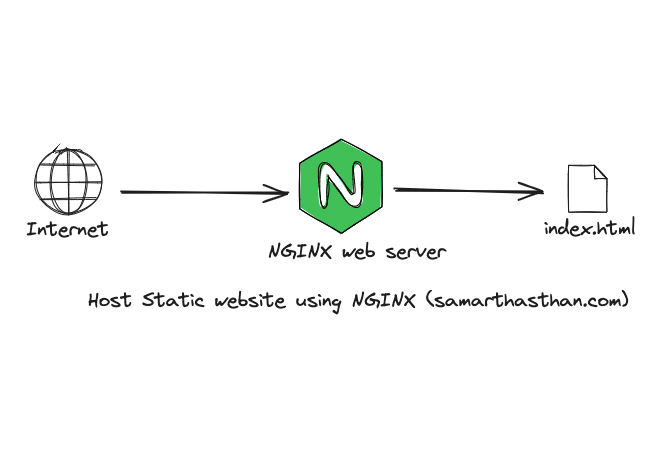
Setting up a static website with Nginx is a straightforward process that provides a fast and reliable way to host web pages. Nginx is a high-performance web server known for its efficiency and ability to serve static content quickly. This guide will walk you through the steps to configure Nginx to serve a static website.
1. Prerequisites
Before setting up your static website, ensure you have the following:
System Requirements
- A server running a Linux distribution (e.g., Ubuntu, Debian, CentOS).
- Root or sudo privileges to install and configure software.
Installed Software
- Nginx: If not installed, follow the instructions in Section 2.
- Static Website Files: HTML, CSS, JavaScript, and other assets.
2. Install Nginx
Step 1: Update the System
Ensure your system is up to date:
sudo apt update && sudo apt upgrade -y  # For Debian/Ubuntu
sudo yum update -y                      # For CentOS/RHEL
Step 2: Install Nginx
Install Nginx using your package manager:
- Ubuntu/Debian:
sudo apt install nginx -y - CentOS/RHEL:
sudo yum install nginx -y
Step 3: Start and Enable Nginx
Start the Nginx service and enable it to run on boot:
sudo systemctl start nginx
sudo systemctl enable nginx
3. Configure Nginx for a Static Website
Step 1: Create a Directory for Your Website
Create a directory to store your website files. For example:
sudo mkdir -p /var/www/static-websiteSet the appropriate permissions:
sudo chown -R $USER:$USER /var/www/static-website
sudo chmod -R 755 /var/www/static-website
Step 2: Add Your Static Files
Copy your HTML, CSS, JavaScript, and other assets to /var/www/static-website. For example:
cp -r /path/to/your/static/files/* /var/www/static-website/Step 3: Create an Nginx Server Block
Create a new configuration file for your static website:
sudo nano /etc/nginx/sites-available/static-websiteAdd the following configuration:
server {
    listen 80;
    server_name yourdomain.com www.yourdomain.com;

    root /var/www/static-website;
    index index.html;

    location / {
        try_files $uri $uri/ =404;
    }
}
Step 4: Enable the Configuration
Link the configuration file to the sites-enabled directory:
sudo ln -s /etc/nginx/sites-available/static-website /etc/nginx/sites-enabled/Test the configuration for syntax errors:
sudo nginx -tIf the test is successful, reload Nginx:
sudo systemctl reload nginx4. Test Your Static Website
Step 1: Access the Website
Open a web browser and navigate to http://yourdomain.com or the server’s IP address.
Step 2: Troubleshoot Common Issues
- 403 Forbidden Error: Check file permissions in
/var/www/static-website. - Configuration Errors: Review the Nginx configuration file and ensure there are no syntax errors.
- Firewall Rules: Ensure port 80 (HTTP) is open:
sudo ufw allow 80/tcp   # Ubuntu/Debian
sudo firewall-cmd --permanent --add-service=http && sudo firewall-cmd --reload   # CentOS/RHEL
5. Secure Your Website with HTTPS (Optional)
Use Certbot to obtain a free SSL certificate from Let’s Encrypt:
sudo apt install certbot python3-certbot-nginx  # For Ubuntu/Debian
sudo yum install certbot python3-certbot-nginx  # For CentOS/RHEL
Run the Certbot command to configure HTTPS:
sudo certbot --nginxFollow the prompts to complete the process.
6. Best Practices
- Organize Your Files: Use a logical folder structure for assets (e.g.,
/css,/js,/images). - Keep Nginx Updated: Regularly update Nginx to ensure you have the latest features and security patches.
- Monitor Logs: Check logs for issues using:
sudo tail -f /var/log/nginx/access.log sudo tail -f /var/log/nginx/error.log - Optimize for Performance: Enable caching and gzip compression for faster loading times.
7. Conclusion
By following this guide, you can quickly set up a static website using Nginx. This configuration provides a robust, efficient, and scalable solution for serving static content. With additional optimizations and security enhancements, you can ensure a professional and secure web presence.


