How to Set Up a Samba File Server on Ubuntu

How to Set Up a Samba File Server on Ubuntu
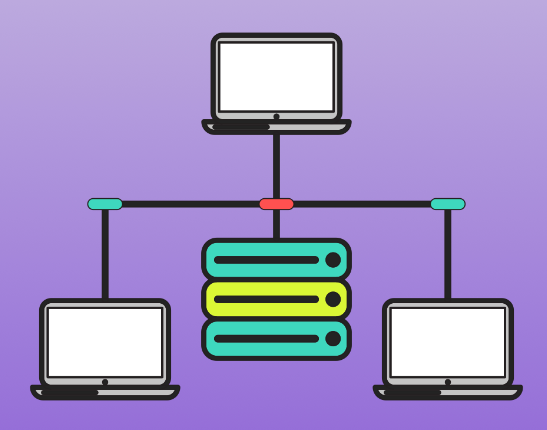
Setting up a Samba file server on Ubuntu allows you to share files across different operating systems, including Windows, macOS, and Linux. Samba is an open-source implementation of the SMB/CIFS networking protocol, providing seamless file and print services to SMB/CIFS clients. This guide will walk you through the process of installing and configuring Samba on Ubuntu, allowing you to share files and folders easily.
Prerequisites
Before you start, ensure that you have the following:
- A running Ubuntu server (Ubuntu 20.04 or later is recommended).
- Root or sudo access to the server.
- Basic knowledge of the command line.
Step 1: Update Your System
Begin by updating your package lists to ensure that you have the latest information on available packages:
sudo apt update
sudo apt upgrade
This command updates your system’s package list and installs any available upgrades.
Step 2: Install Samba
To install Samba, execute the following command:
sudo apt install samba
This command installs the Samba server and client packages. During the installation, all necessary dependencies will also be installed.
Step 3: Configure Samba
Once the installation is complete, you need to configure Samba. The configuration file is located at /etc/samba/smb.conf. Before editing this file, it is a good idea to create a backup:
sudo cp /etc/samba/smb.conf /etc/samba/smb.conf.bak
Now, open the configuration file in a text editor. You can use nano or any other text editor of your choice:
sudo nano /etc/samba/smb.conf
Global Settings
In the configuration file, you will find a section labeled [global]. This section contains settings that apply to all Samba shares. Below are some recommended settings:
[global]
workgroup = WORKGROUP
server string = Samba Server %v
netbios name = ubuntu
security = user
map to guest = bad user
dns proxy = no
- workgroup: This should match the workgroup name used by your Windows machines (default is WORKGROUP).
- server string: A description for your Samba server.
- netbios name: The name by which your Samba server will be known in the network.
- security: Setting to user allows individual user authentication.
- map to guest: Allows unauthorized users access to a guest account.
- dns proxy: Set to no to avoid DNS lookups.
Define Shares
Next, you can define the directories you want to share. For instance, let’s create a shared directory named shared under /srv/samba/. First, create the directory:
sudo mkdir -p /srv/samba/shared
Set the permissions so that Samba can read and write to the directory:
sudo chown nobody:nogroup /srv/samba/shared
sudo chmod 0777 /srv/samba/shared
Now, add the following section to the smb.conf file to define the share:
[Shared]
path = /srv/samba/shared
browsable = yes
writable = yes
guest ok = yes
read only = no
create mask = 0755
directory mask = 0755
path: The directory path to be shared.
browsable: Set to yes to allow users to see the share in their file manager.
writable: Set to yes to allow write access.
guest ok: Allows guest users to access the share.
create mask: Sets default permissions for files created in the share.
directory mask: Sets default permissions for directories created in the share.
Step 4: Restart Samba Service
After making changes to the configuration file, restart the Samba service to apply the changes:
sudo systemctl restart smbd
To ensure Samba starts on boot, enable the service:
sudo systemctl enable smbd
Step 5: Allow Samba Through the Firewall
If your server has a firewall enabled, you need to allow Samba traffic. You can do this by executing:
sudo ufw allow samba
Check the status of your firewall to ensure that the rules have been applied:
sudo ufw status
Step 6: Accessing the Samba Share
You can access the Samba share from a different machine. Here’s how to do it on different operating systems:
- On Windows
Open File Explorer.
In the address bar, type \\ (replace with your actual server IP address) and press Enter.
You should see the Shared folder listed. You can access it without entering any credentials since we set guest ok = yes. - On macOS
Open Finder.
Click on Go in the menu bar, then select Connect to Server.
Enter smb:// and click Connect.
You should see the Shared folder. - On Linux
Open a file manager and enter smb:// in the address bar, or you can mount it via the command line:
sudo mount -t cifs ///Shared /mnt/shared -o guest
Step 7: Adding Users to Samba
If you want to restrict access to the Samba share, you can create a Samba user. First, create a system user if it doesn’t already exist:
sudo adduser sambauser
Then, add the user to Samba with the following command:
sudo smbpasswd -a sambauser
You will be prompted to set a password for the Samba user. Once the user is added, you can modify the share configuration to restrict access to that user:
[Shared]
…
valid users = sambauser
After making these changes, restart Samba:
sudo systemctl restart smbd
The Official Samba Documentation
Thank you for visiting our page! If you’re interested in exploring more articles about Linux systems and OwnCloud for Personal Cloud Storage , feel free to check out the links below.


