How to Set Up a CI/CD Pipeline with GitLab CI

How to Set Up a CI/CD Pipeline with GitLab CI
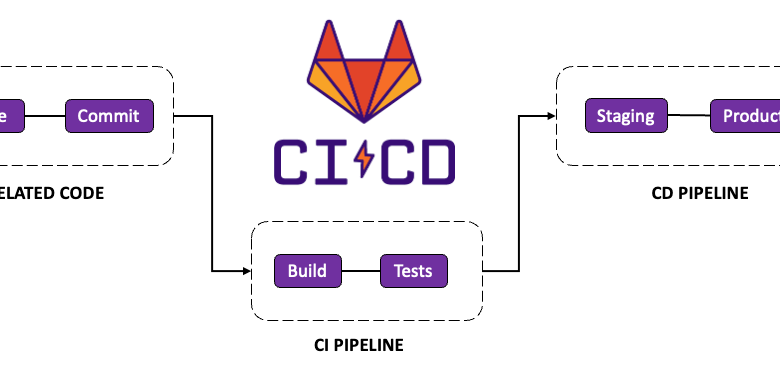
Continuous Integration and Continuous Deployment (CI/CD) are essential practices for modern software development. They help streamline workflows, improve code quality, and ensure faster delivery of software. GitLab CI is one of the most powerful tools available for implementing CI/CD pipelines, thanks to its flexibility and seamless integration with GitLab repositories. In this guide, we will explore how to set up a CI/CD pipeline using GitLab CI.
Understanding CI/CD and GitLab CI
What is CI/CD?
CI/CD stands for Continuous Integration and Continuous Deployment (or Delivery). It involves automating the integration of code changes and their subsequent deployment to production or testing environments. Key benefits of CI/CD include:
- Faster Feedback: Developers receive immediate feedback on their code.
- Improved Code Quality: Automated tests ensure that only stable code progresses.
- Enhanced Collaboration: Teams work more effectively with shared pipelines.
Why Use GitLab CI?
GitLab CI/CD is tightly integrated into the GitLab platform, making it an excellent choice for teams already using GitLab repositories. Key features include:
- Built-in Pipelines: Easy setup and management.
- Custom Runners: Flexibility in execution environments.
- Extensive Integration: Support for Docker, Kubernetes, and other modern tools.
Step 1: Prerequisites
Before starting, ensure you have the following:
- A GitLab Account: Sign up for a free GitLab account if you don’t already have one.
- A GitLab Repository: Create a new project or use an existing one.
- Basic Knowledge of YAML: GitLab CI pipelines are defined in YAML files.
- Runner Availability: GitLab runners are required to execute pipeline jobs. You can use shared or specific runners.
Step 2: Configuring GitLab CI
Adding .gitlab-ci.yml
The pipeline configuration is stored in a file named .gitlab-ci.yml in the root directory of your repository. This file defines the stages, jobs, and scripts to run. Here’s a basic example:
stages:
– build
– test
– deploybuild_job:
stage: build
script:
– echo “Building the application…”
– ./build.shtest_job:
stage: test
script:
– echo “Running tests…”
– ./run-tests.shdeploy_job:
stage: deploy
script:
– echo “Deploying the application…”
– ./deploy.sh
Key Components of .gitlab-ci.yml
- Stages: Define the sequence of operations (e.g., build, test, deploy).
- Jobs: Represent individual tasks in a stage.
- Scripts: Specify the commands to execute.
Step 3: Configuring Runners
What Are Runners?
Runners are lightweight agents that execute CI/CD jobs. GitLab provides shared runners, or you can set up your own.
Setting Up a Custom Runner
- Install GitLab Runner:
- On Linux:
curl -L –output /usr/local/bin/gitlab-runner https://gitlab-runner-downloads.s3.amazonaws.com/latest/binaries/gitlab-runner-linux-amd64
chmod +x /usr/local/bin/gitlab-runner
-
- For other operating systems, refer to the official documentation.
- Register the Runner:
gitlab-runner register
-
- Enter the GitLab instance URL.
- Provide a registration token from your GitLab project.
- Choose an executor (e.g., Docker, shell, Kubernetes).
- Verify the Runner: Ensure it appears under Settings > CI/CD > Runners in your project.
Step 4: Implementing Advanced Features
Using Variables
Define environment variables to manage secrets and configurations:
variables:
DATABASE_URL: “postgres://user:password@localhost:5432/db”
Access them in scripts:
script:
– echo $DATABASE_URL
Caching Dependencies
Speed up pipelines by caching dependencies:
cache:
paths:
– node_modules/
Artifacts
Preserve build outputs for later stages:
artifacts:
paths:
– build/
Using Docker
Run jobs inside Docker containers:
image: node:14
script:
– npm install
– npm test
Step 5: Monitoring and Optimizing
Viewing Pipeline Results
Navigate to the CI/CD > Pipelines section in your GitLab project to see:
- Pipeline status (passed, failed, running).
- Logs for individual jobs.
Optimizing Pipelines
- Parallel Jobs: Use
needsto run jobs in parallel:
job1:
stage: buildjob2:
stage: build
needs: [“job1”]
- Split Tests: Distribute tests across multiple jobs for faster execution.
- Auto-cancel Redundant Pipelines: Enable this in Settings > CI/CD > General to cancel obsolete pipelines.
Conclusion
Setting up a CI/CD pipeline with GitLab CI is straightforward yet powerful. By defining stages and jobs in .gitlab-ci.yml, configuring runners, and utilizing advanced features like caching and Docker, you can automate your workflows and improve software delivery. As you grow familiar with GitLab CI, you can further customize pipelines to suit your specific needs, ensuring faster, more reliable deployments.


