How to Install and Use Conky for System Monitoring

How to Install and Use Conky for System Monitoring
Conky is a lightweight, highly configurable system monitor for Linux. It provides real-time information about your system, including CPU usage, memory usage, disk space, and network activity, all displayed on your desktop. In this guide, we will walk you through the steps to install and configure Conky, allowing you to tailor it to your specific needs.
Why Use Conky?
Conky stands out for its versatility and customization options. Unlike traditional system monitors, it can be embedded directly onto your desktop, blending seamlessly with your background. This not only makes your workspace visually appealing but also keeps essential system metrics at your fingertips. Moreover, Conky supports various visual elements, allowing you to create a unique and informative display.
Prerequisites
Before diving into the installation, ensure you have a Linux distribution installed. Conky is available for various distributions, including Ubuntu, Fedora, Arch Linux, and more. You should also have administrative privileges on your system to install software.
Installing Conky
The installation process varies slightly depending on your Linux distribution. Here’s how to install Conky on some of the most popular distributions:
For Ubuntu/Debian-based Systems
Open Terminal: You can find Terminal in your applications menu or use the shortcut Ctrl + Alt + T.
Update Package List: Run the following command to ensure your package list is up-to-date:
sudo apt update
Install Conky: Use the following command to install Conky:
sudo apt install conky
For Fedora
Open Terminal.
Install Conky: Run the following command:
sudo dnf install conky
For Arch Linux
Open Terminal.
Install Conky: Execute the following command:
sudo pacman -S conky
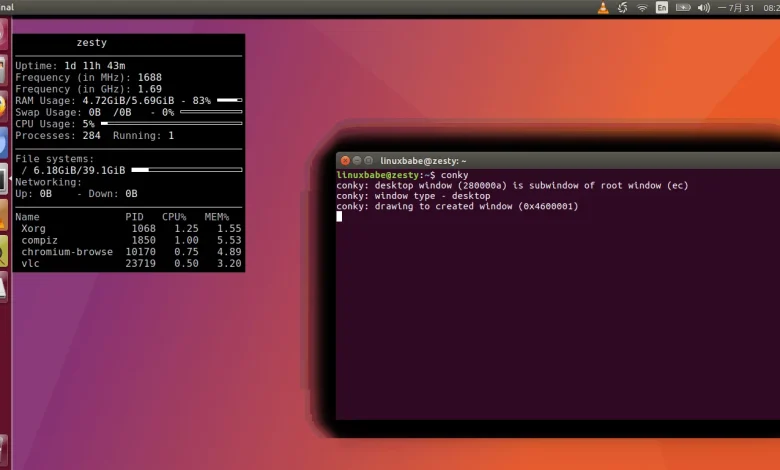
Once the installation is complete, you can start Conky by simply typing conky in the terminal.
Configuring Conky
Conky comes with a default configuration file located at ~/.conkyrc. You can create or modify this file to customize how Conky displays system information.
1. Create a Configuration File
If the .conkyrc file does not exist, create it with the following command:
touch ~/.conkyrc
2. Open the Configuration File
Use a text editor to open the file. For example, using nano:
nano ~/.conkyrc
3. Basic Configuration
Here’s a simple configuration template to get you started:
conky.config = {
background = true,
update_interval = 1,
double_buffer = true,
own_window = true,
own_window_type = ‘desktop’,
own_window_transparent = true,
own_window_title = ‘Conky’,
draw_shades = false,
draw_outline = false,
draw_borders = false,
alignment = ‘top_right’,
gap_x = 10,
gap_y = 10,
};conky.text = [[
${color grey}System: $sysname $kernel
${color grey}Uptime: $uptime
${color grey}CPU: $cpu% ${cpubar}
${color grey}Memory: $mem / $memmax ${membar}
${color grey}Disk Usage: ${fs_used /} / ${fs_size /} ${fs_bar /}
${color grey}Network: ${addr eth0}
]];
Explanation of the Configuration
background: This enables Conky to run in the background.
update_interval: Defines how often Conky updates the information (in seconds).
own_window: Specifies whether Conky should create its own window.
alignment: Controls where Conky appears on the desktop (e.g., top right).
conky.text: Contains the information displayed. You can customize it with various Conky variables, such as ${cpu}, ${mem}, ${fs_used}, and others.
4. Save and Exit
After modifying your .conkyrc file, save your changes and exit the text editor. In nano, press Ctrl + O, then Enter to save, and Ctrl + X to exit.
Running Conky
To start Conky, simply type conky in the terminal. If everything is configured correctly, you should see the Conky display on your desktop.
Making Conky Start at Boot
To have Conky start automatically when you log in, you can add it to your startup applications. The process may vary depending on your desktop environment, but typically you can do this by:
Accessing Startup Applications: Look for “Startup Applications” in your application menu.
Adding Conky: Click “Add” and enter the command conky. You can also provide a name and comment if you wish.
Customizing Your Conky Display
Conky’s true power lies in its customization. You can change fonts, colors, and the information displayed according to your preferences. Here are some ideas to get you started:
Add Weather Information: You can fetch and display weather data using APIs. Look into using curl or other command-line tools to fetch the data and display it in Conky.
System Information: Customize it to show additional metrics like GPU usage, temperature sensors, and more. For example, to display GPU temperature, you might include:
${color grey}GPU Temp: ${execi 10 sensors | grep ‘temp1’ | awk ‘{print $2}’}
Using Images and Icons: You can use images or icons for a more aesthetic look. Use the ${image} command to display images in your Conky window.


