Setting up a Git repository on a remote server is a common task for developers and system administrators. It allows teams to collaborate on code, maintain version control, and deploy applications efficiently. This guide will walk you through the process of setting up a Git repository on a remote server, covering all the technical details and best practices.
Table of Contents
- Introduction to Git and Remote Repositories
- Prerequisites
- Setting Up the Remote Server
- Installing Git
- Creating a Git User
- Configuring SSH Access
- Creating a Bare Git Repository
- Cloning the Remote Repository to a Local Machine
- Pushing and Pulling Changes
- Managing Access Control
- Automating Deployment with Git Hooks
- Best Practices for Remote Git Repositories
- Conclusion
1. Introduction to Git and Remote Repositories
Git is a distributed version control system that allows multiple developers to work on a project simultaneously. A remote Git repository is a centralized location where the project’s codebase is stored and shared among team members. Common use cases for remote Git repositories include:
- Collaborative development.
- Continuous integration and deployment (CI/CD).
- Backup and version control.
Popular platforms like GitHub, GitLab, and Bitbucket provide hosted remote repositories, but you can also set up your own Git server for full control over your codebase.
2. Prerequisites
Before setting up a Git repository on a remote server, ensure you have the following:
- A remote server with SSH access (e.g., a VPS or cloud instance).
- Administrative (root) access to the server.
- Git installed on both the remote server and your local machine.
- Basic knowledge of Git commands and SSH.
3. Setting Up the Remote Server
Installing Git
First, log in to your remote server via SSH:
ssh user@remote-server-ip
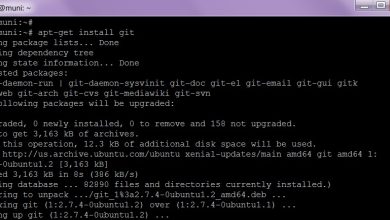
Update the package list and install Git:
sudo apt update
sudo apt install git
Verify the installation:
git --version
Creating a Git User
For security reasons, it’s a good practice to create a dedicated user for Git operations:
sudo adduser git
Set a strong password for the git user, or disable password login and rely solely on SSH keys for authentication.
Configuring SSH Access
To allow secure access to the Git repository, configure SSH key-based authentication for the git user.
- Generate an SSH Key on Your Local Machine (if you don’t already have one):
ssh-keygen -t rsa -b 4096 -C "[email protected]"
Save the key to the default location (
~/.ssh/id_rsa) and set a passphrase for added security. - Copy the Public Key to the Remote Server:
Use the
ssh-copy-idcommand to copy your public key to thegituser’sauthorized_keysfile:ssh-copy-id git@remote-server-ip
- Test SSH Access:
Verify that you can log in as the
gituser without a password:ssh git@remote-server-ip
4. Creating a Bare Git Repository
A bare Git repository is a repository without a working directory, which is ideal for remote servers. To create a bare repository, follow these steps:
- Log in as the
gituser:ssh git@remote-server-ip - Create a directory for the repository:
mkdir -p /home/git/repos/my-project.git
cd /home/git/repos/my-project.git
- Initialize the bare repository:
git init --bare
This creates a bare repository with the necessary Git files but no working directory.
5. Cloning the Remote Repository to a Local Machine
To start working with the remote repository, clone it to your local machine:
git clone git@remote-server-ip:/home/git/repos/my-project.git
This will create a local copy of the repository in the current directory.
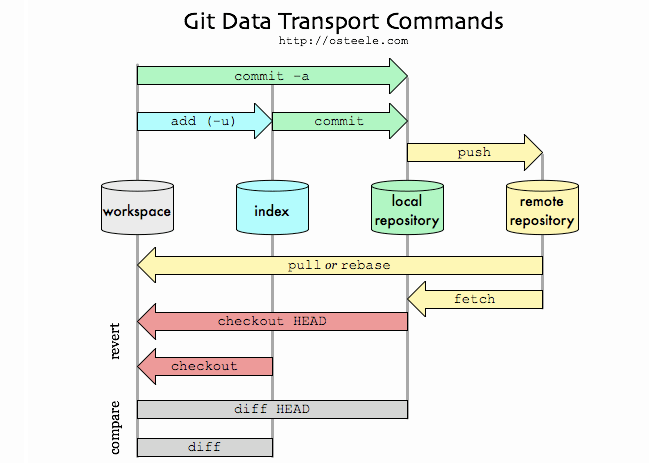
6. Pushing and Pulling Changes
Once you’ve cloned the repository, you can make changes locally and push them to the remote server.
- Make Changes Locally:
Add, commit, and push your changes:
git add .
git commit -m "Initial commit"
git push origin main
Replace
mainwith the name of your default branch if it’s different. - Pull Changes from the Remote Repository:
To update your local repository with changes from the remote server:
git pull origin main
7. Managing Access Control
To control who can access the Git repository, you can manage SSH keys for the git user.
- Add SSH Keys for Team Members:
Have each team member generate an SSH key and send you their public key. Append their public keys to the
authorized_keysfile:echo "team-member-public-key" >> /home/git/.ssh/authorized_keys
- Restrict Shell Access:
To prevent the
gituser from logging in with a shell, change their shell togit-shell:sudo chsh -s /usr/bin/git-shell git
This restricts the
gituser to Git operations only.
8. Automating Deployment with Git Hooks
Git hooks are scripts that run automatically when certain events occur in the repository. You can use hooks to automate tasks like deployment.
- Create a Post-Receive Hook:
Navigate to the
hooksdirectory in your bare repository:cd /home/git/repos/my-project.git/hooksCreate a
post-receivehook:nano post-receive - Add Deployment Logic:
For example, to deploy changes to a web server directory:
#!/bin/bash
TARGET="/var/www/my-project"
GIT_DIR="/home/git/repos/my-project.git"
BRANCH="main"

while read oldrev newrev ref
do
  if [[ $ref =~ .*/$BRANCH$ ]];
  then
    echo "Deploying $BRANCH to $TARGET..."
    git --work-tree=$TARGET --git-dir=$GIT_DIR checkout -f $BRANCH
  fi
done
- Make the Hook Executable:
chmod +x post-receive
9. Best Practices for Remote Git Repositories
- Use SSH Keys: Always use SSH keys for secure access.
- Regular Backups: Regularly back up your Git repositories.
- Monitor Access: Keep track of who has access to the repository.
- Use Branches: Follow a branching strategy (e.g., Git Flow) to manage code changes.
- Enable Hooks: Use Git hooks to automate repetitive tasks.
10. Conclusion
Setting up a Git repository on a remote server is a straightforward process that provides significant benefits for collaboration and version control. By following this guide, you can create a secure and efficient Git server tailored to your team’s needs. Whether you’re managing a small project or a large-scale application, a well-configured remote Git repository is an essential tool for modern software development.
Happy coding!