How to Use the dd Command for Disk Cloning

The dd command is a powerful and versatile utility in Unix and Linux systems for low-level copying and conversion of data. One of its most common use cases is disk cloning, which involves creating an exact replica of a storage device. This guide provides a comprehensive overview of how to use the dd command for disk cloning, ensuring safe and efficient operations.
What is the dd Command?
The dd command, short for “data duplicator,” is designed to copy data at the byte level between files or devices. Its primary features include:
- Creating exact backups of disks or partitions.
- Copying and converting data between formats.
- Writing ISO images to USB drives.
- Cloning entire drives or partitions.
The syntax for the dd command is as follows:
dd if=<input_file> of=<output_file> [options]Parameters:
if: Input file or device (e.g.,/dev/sda).of: Output file or device (e.g.,/dev/sdborbackup.img).- Options: Additional parameters to control block size, error handling, etc.
Preparing for Disk Cloning
Before using dd for disk cloning, take the following precautions:
- Identify Devices: Use the
lsblkorfdisk -lcommand to list all connected storage devices:lsblkOutput example:
NAME   MAJ:MIN RM   SIZE RO TYPE MOUNTPOINT
sda      8:0    0   500G  0 disk
sdb      8:16   0   500G  0 disk
Identify the source (input) and target (output) devices carefully.
- Unmount Target Device: If the target device is mounted, unmount it to prevent data corruption:
sudo umount /dev/sdb - Backup Critical Data: Disk cloning will overwrite the target device completely. Ensure important data is backed up.
- Ensure Sufficient Privileges: Run the
ddcommand withsudoto access raw devices.
Cloning a Disk with dd
Basic Disk Cloning
To clone a disk (/dev/sda) to another disk (/dev/sdb):
sudo dd if=/dev/sda of=/dev/sdb bs=64K conv=noerror,syncExplanation:
if=/dev/sda: Specifies the source device.of=/dev/sdb: Specifies the target device.bs=64K: Sets the block size to 64 kilobytes (adjust for better performance).conv=noerror,sync:noerror: Continues operation even if errors are encountered.sync: Pads blocks with zeroes in case of errors.
Cloning a Partition
To clone a specific partition (/dev/sda1):
sudo dd if=/dev/sda1 of=/dev/sdb1 bs=64K conv=noerror,syncCreating Disk Images
Create a Backup Image
To create an image file of a disk (/dev/sda):
sudo dd if=/dev/sda of=/path/to/backup.img bs=64K conv=noerror,syncThis creates a file (backup.img) that contains an exact copy of the disk.
Restore a Disk from an Image
To restore a disk using the image file:
sudo dd if=/path/to/backup.img of=/dev/sda bs=64K conv=noerror,syncEnsure the target disk matches the original in size to avoid issues.
Writing ISO Files to USB Drives
To create a bootable USB drive from an ISO file:
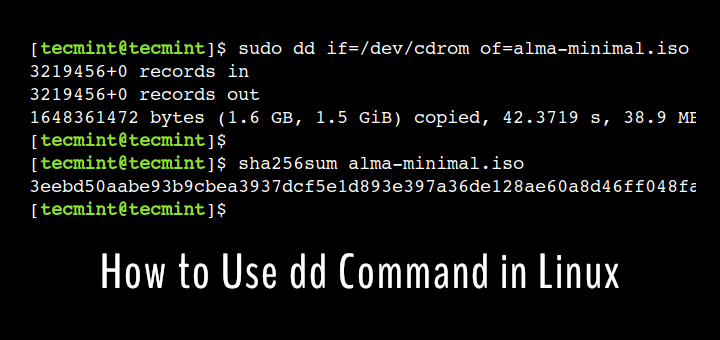
sudo dd if=/path/to/iso_file.iso of=/dev/sdb bs=4M status=progressExplanation:
if=/path/to/iso_file.iso: Specifies the ISO file as the source.of=/dev/sdb: Specifies the USB drive as the target.bs=4M: Uses a block size of 4 megabytes for better performance.status=progress: Displays real-time progress of the operation.
Monitoring dd Progress
By default, dd does not provide progress updates. Use the status=progress option to monitor real-time progress:
sudo dd if=/dev/sda of=/dev/sdb bs=64K conv=noerror,sync status=progressAlternatively, send a USR1 signal to the running dd process:
- Find the process ID (PID):
pidof dd - Send the signal:
sudo kill -USR1 <PID>This displays the progress in the terminal where
ddis running.
Common Use Cases
1. Backup and Restore
- Create a full backup of a disk.
- Restore the backup to the same or another disk.
2. Disk Upgrades
- Clone data from an old disk to a new, larger disk.
3. Forensics
- Create exact replicas of disks for analysis.
Best Practices and Tips
- Double-Check Device Names: Mistaking the source and target devices can lead to data loss.
- Optimize Block Size: Test different block sizes (
bs) for optimal performance. Common values are 64K, 128K, or 1M. - Use Compression: Save space when creating images by piping the output through compression tools:
sudo dd if=/dev/sda bs=64K | gzip > backup.img.gzTo restore:
gunzip -c backup.img.gz | sudo dd of=/dev/sda - Test Cloned Disks: Boot the cloned disk or verify its contents to ensure the process was successful.
Risks and Limitations
- Overwriting Data: Using the wrong target device can result in irreversible data loss.
- Error Handling: While
conv=noerrorallows the process to continue after encountering errors, some data may still be lost. - Performance:
ddoperations can be slow, especially for large disks. Consider alternatives likersyncor dedicated cloning tools for specific scenarios.
Conclusion
The dd command is a robust tool for disk cloning and data management. By following the steps and best practices outlined in this guide, you can safely and effectively use dd for creating backups, cloning disks, and writing ISO images. Always exercise caution when working with raw devices to avoid unintended data loss.


