How to Install and Use FreeCAD for 3D Modeling

How to Install and Use FreeCAD for 3D Modeling
FreeCAD is a powerful open-source parametric 3D CAD (Computer-Aided Design) software that is ideal for a variety of applications, including product design, mechanical engineering, and architecture. Its flexibility and extensibility make it an excellent choice for both beginners and advanced users. In this guide, we’ll walk you through the installation process for FreeCAD and cover the essential features to get you started with 3D modeling.
What is FreeCAD?
Before diving into the installation, let’s briefly discuss what FreeCAD is and why you might choose it over other CAD software. FreeCAD is designed to be modular, allowing users to customize their workspace and functionalities according to their needs. It supports a variety of file formats, making it easy to collaborate with other software tools. Additionally, being open-source means that it is free to use and constantly updated by a community of developers.
System Requirements
Before installing FreeCAD, ensure that your system meets the following requirements:
Operating System: Windows 7 or later, macOS 10.12 or later, or a recent version of Linux.
RAM: At least 4 GB (8 GB or more recommended for complex models).
Processor: 64-bit processor (Intel or AMD).
Graphics: A GPU that supports OpenGL 2.1 or higher.
Step-by-Step Installation Guide
For Windows
Download FreeCAD: Visit the FreeCAD official website and navigate to the Download section. Choose the Windows installer (usually in .exe format).
Run the Installer: Locate the downloaded file in your Downloads folder and double-click it to start the installation process.
Follow the Installation Wizard: Accept the license agreement and choose the installation directory. You can leave it as the default unless you have a specific location in mind.
Complete Installation: Once the installation is finished, you can choose to launch FreeCAD immediately.
For macOS
Download FreeCAD: Go to the FreeCAD website and download the macOS version.
Open the DMG File: Double-click the downloaded .dmg file to mount it.
Drag to Applications: Drag the FreeCAD icon into your Applications folder to install it.
Launch FreeCAD: Open your Applications folder and click on FreeCAD to start using the software.
For Linux
Use Package Manager: Depending on your distribution, you can use a package manager to install FreeCAD. For Ubuntu, for example, open a terminal and run:
sudo apt install freecad
Download AppImage: Alternatively, you can download the AppImage from the FreeCAD website, making it portable across different Linux distributions.
Make Executable: If you downloaded the AppImage, navigate to your Downloads folder and make it executable:
chmod +x FreeCAD-*.*-x86_64.AppImage
Run the AppImage: Execute the AppImage by double-clicking it or running it from the terminal.
Getting Started with FreeCAD
Once FreeCAD is installed, it’s time to explore its interface and features.
User Interface Overview
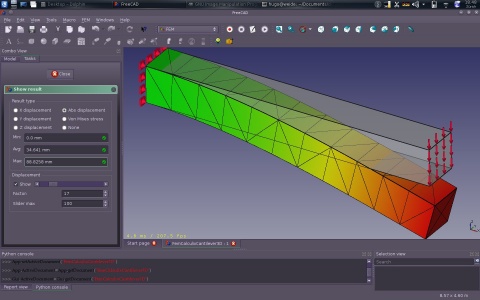
When you launch FreeCAD, you will see several panels, including:
Toolbar: Contains tools for various functions, including sketching, part design, and assembly.
Combo View: Displays the project tree and properties of selected objects.
3D View: The main workspace where your models will be created and manipulated.
Creating Your First Model
Start a New Project: Click on File > New to create a new project.
Select a Workbench: FreeCAD offers different workbenches tailored for specific tasks. For 3D modeling, select the “Part” workbench from the dropdown menu.
Create a New Sketch: Click on the “Create a new sketch” icon, and choose a plane (XY, XZ, or YZ) where you want to start drawing.
Draw Basic Shapes: Use the sketch tools to create basic shapes like rectangles and circles. You can constrain your sketch by adding dimensions, ensuring your design maintains specific proportions.
Extrude Your Sketch: After completing your sketch, close the sketch editor and select your sketch in the project tree. Click on the “Part” menu and choose “Extrude” to convert your 2D sketch into a 3D shape.
Modify Your Model: Use the features in the toolbar to modify your model. You can add holes, fillets, and other geometric operations to refine your design.
Saving Your Project
To save your work, click on File > Save As, and choose a location and file format. FreeCAD supports various formats, including its native .FCStd format, which retains all project data.
Additional Resources
FreeCAD has a vast array of documentation and tutorials available online. The FreeCAD Wiki is an excellent resource for learning about advanced features, scripting, and community support. You can also find video tutorials on platforms like YouTube, which can provide step-by-step guides for specific projects.


