How to Use Docker Volumes for Persistent Storage

How to Use Docker Volumes for Persistent Storage
Docker has revolutionized the way we deploy and manage applications by providing containerization technology. One of the critical aspects of working with containers is data persistence. By default, any data stored within a container is ephemeral; once the container stops or is removed, all the data is lost. This is where Docker volumes come into play, enabling persistent storage that is decoupled from the lifecycle of a container. This article will provide an in-depth guide on how to use Docker volumes for persistent storage.
What Are Docker Volumes?
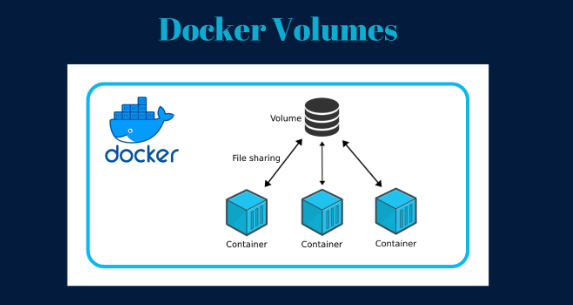
Docker volumes are directories that are stored outside of the container’s filesystem, making them persistent even when the container is stopped or removed. Volumes are managed by Docker and can be shared among multiple containers, which is especially useful in multi-container applications. This persistent storage mechanism allows you to maintain stateful data, such as databases, configuration files, and logs, without worrying about losing it when a container is recreated or updated.
Why Use Docker Volumes?
There are several reasons why you should use Docker volumes:
- Persistence: Volumes allow data to persist beyond the lifespan of a single container instance.
- Performance: Volumes provide better performance than storing data in the container’s filesystem since they bypass the union filesystem.
- Sharing: Multiple containers can share the same volume, facilitating communication and data exchange between them.
- Backups: Volumes can easily be backed up and restored, ensuring data integrity and recovery.
Creating Docker Volumes
Creating a Docker volume is straightforward. You can do this using the Docker CLI. The following command creates a new volume:
docker volume create my_volume
To verify that the volume has been created, you can list all Docker volumes:
docker volume ls
You should see my_volume in the list.
Using Docker Volumes
Once you have created a volume, you can use it in your containers. To mount a volume into a container, you use the -v or –mount flag when running the container. Here’s how you can do it:
Using the -v Flag
The -v flag allows you to specify a volume to mount. The basic syntax is as follows:
docker run -d -v my_volume:/path/in/container my_image
In this example, my_volume is the volume name, and /path/in/container is the directory inside the container where the volume will be mounted. Any data written to this path will be saved in my_volume.
Using the –mount Flag
The –mount flag provides a more verbose and structured way to mount volumes. Here’s how to use it:
docker run -d –mount type=volume,source=my_volume,target=/path/in/container my_image
Both methods achieve the same result, but the –mount flag is generally preferred for complex configurations.
Managing Docker Volumes
Managing Docker volumes involves listing, inspecting, and removing volumes as necessary. Here are some essential commands:
Listing Volumes
To list all volumes, use:
docker volume ls
Inspecting a Volume
To view details about a specific volume, including its mountpoint and usage, you can use:
docker volume inspect my_volume
Removing Volumes
If you no longer need a volume, you can remove it with the following command:
docker volume rm my_volume
Keep in mind that you cannot remove a volume that is currently in use by a container. You must stop and remove the container before you can delete the volume.
Best Practices for Using Docker Volumes
- Use Named Volumes: It is advisable to use named volumes instead of anonymous volumes, as named volumes are easier to manage and reference.
- Backup Your Volumes: Regularly back up the data stored in your volumes to prevent data loss. You can use the docker run command to create a backup container that copies the volume data to a backup location.
- Keep Data Separate: When designing your application, keep application code and data in separate volumes to maintain clarity and organization.
- Monitor Volume Usage: Monitor your volumes for disk usage and performance to ensure they are operating optimally and not causing issues.
For further reading and resources, check the Docker Documentation to gain more insights into Docker volumes and their applications.
Thank you for visiting our page! If you’re interested in exploring more articles about Linux systems and InfluxDB, feel free to check out the links below.
How to Install and Use InfluxDB on Ubuntu
Additionally, by renting a server from our site, you can perform your tests in a reliable and efficient environment, helping you to enhance your skills more quickly. Keep up the great work! 🙂


